If you’re tracking website performance with Google Analytics 4 (GA4), it’s crucial to ensure that your data remains clean and accurate.
One common issue is internal traffic (visits from yourself or your team members) which can skew reports and misrepresent actual user behavior.
Fortunately, GA4 allows you to exclude internal traffic easily.
In this guide, we’ll walk you through the step-by-step process to filter out internal traffic from your GA4 reports.
Step 1: Identify internal traffic by creating an IP-based rule
GA4 allows you to define internal traffic based on IP addresses. Follow these steps:
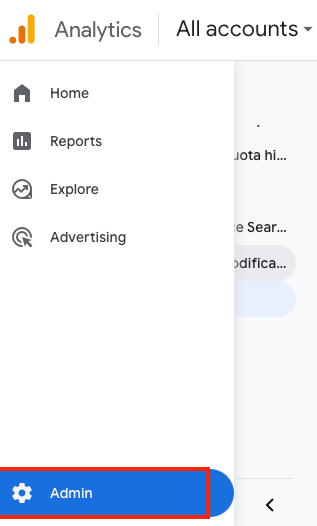
1. Log in to your Google Analytics account and navigate to the ‘Admin‘ panel
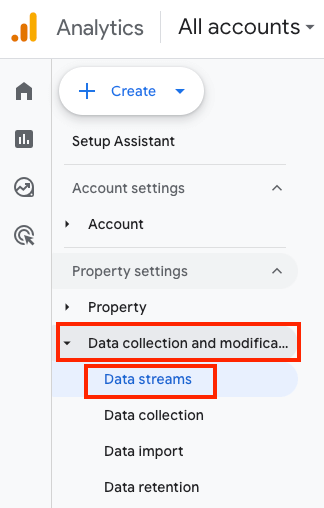
2. Under the ‘Data collection and modification‘ section, select ‘Data streams‘
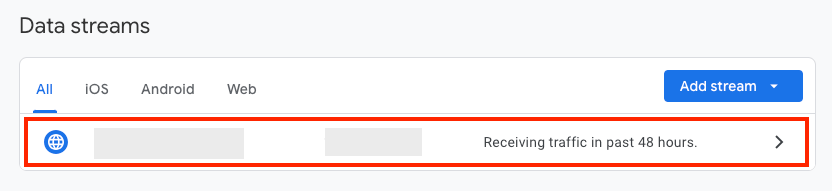
3. Click on your Web data stream to open settings
4. Scroll down and select ‘Configure tag settings‘
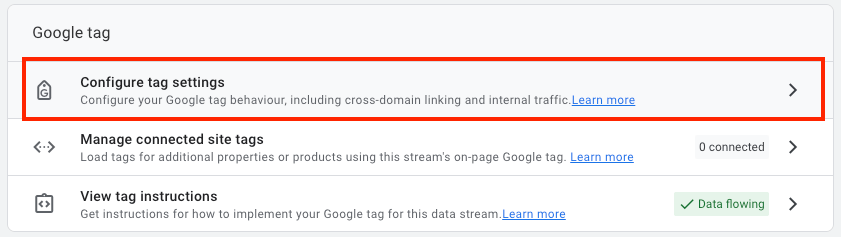
5. Under ‘Settings‘ section, click ‘Show more‘ and then choose ‘Define internal traffic‘
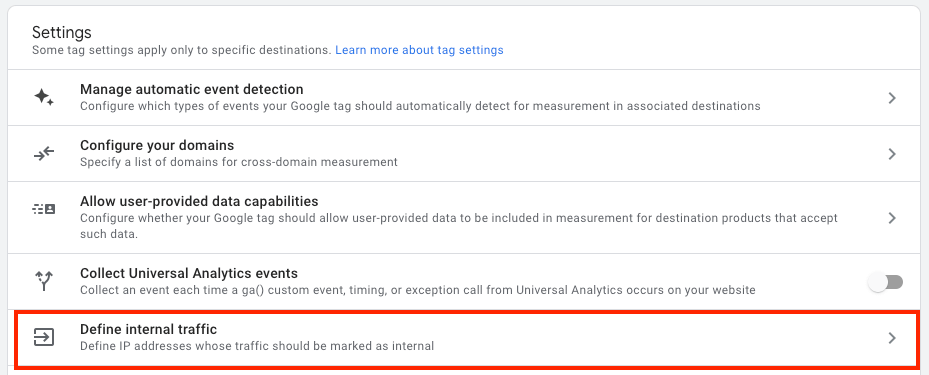
6. Click ‘Create‘ Internal traffic rules

7. Enter the required details:
- Rule name: Name it something recognizable (e.g., “Internal traffic”)
- Traffic_type value: Set a unique value (e.g., “internal”)
- Match type: Choose ‘IP Address equals‘ (or another relevant option if using a range)
- Value: Input the IP address or range (CIDR notation if needed)
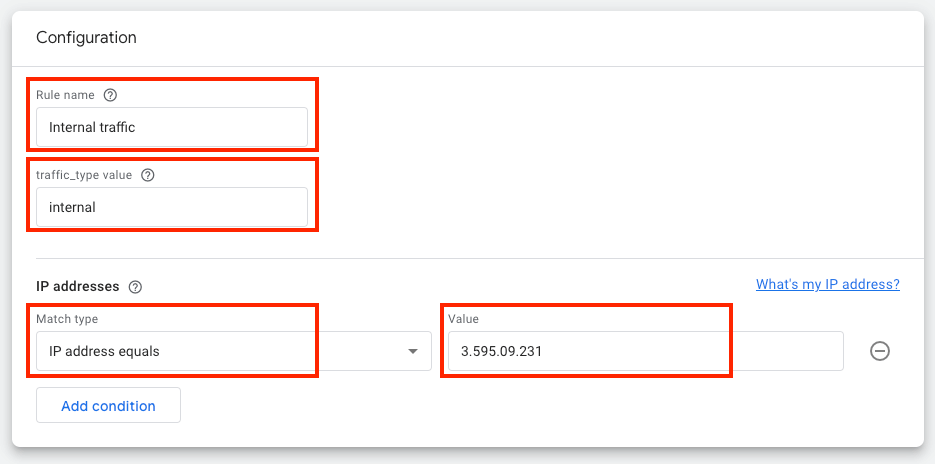
- To check what IP address you have, you can click ‘What’s my IP address?‘ which will show you your IP address in the external Google window. To find your IP address, you can also simply type “what is my IP?” on Google, and your public IP will appear at the top of the search results.

7. Click ‘Create‘ to save the rule.
The end result should look like this:

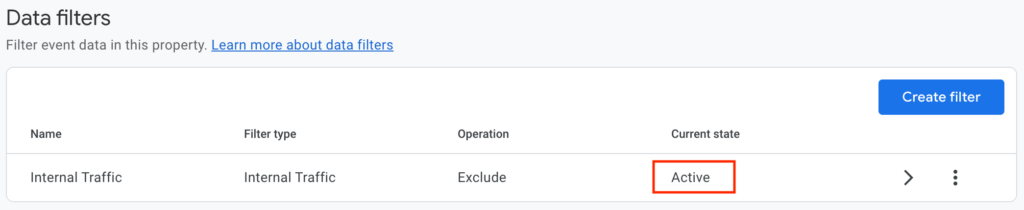
Step 2: Adjust the default internal traffic filter
Unlike previous versions of GA4, the Internal Traffic filter is now created by default but set to “Testing.” You need to update it to “Active” to start excluding internal traffic from your reports.
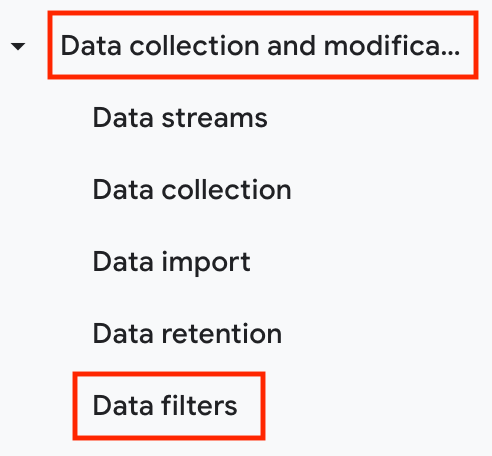
1. Go to the ‘Admin‘ panel
2. Under the ‘Data collection and modification‘ section, select ‘Data filters‘
3. You will see a pre-existing filter named ‘Internal Traffic‘
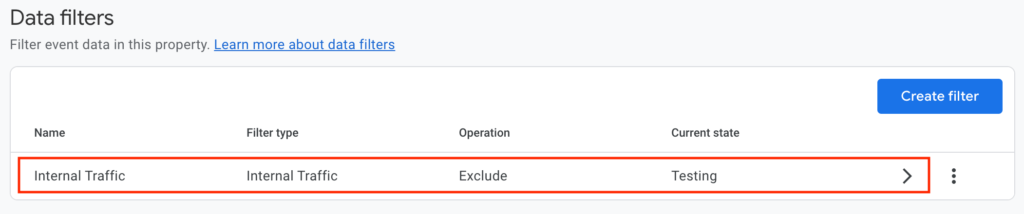
4. Click on the filter and change the ‘Filter state‘ from “Testing” to “Active“
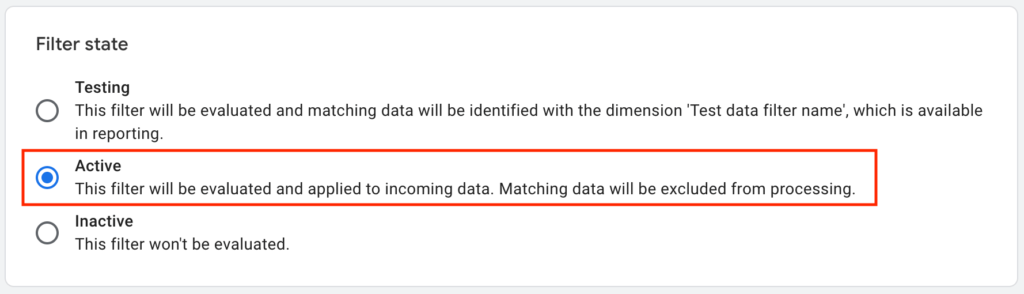
5. Click ‘Save‘ to apply the changes
The end result should look like this:
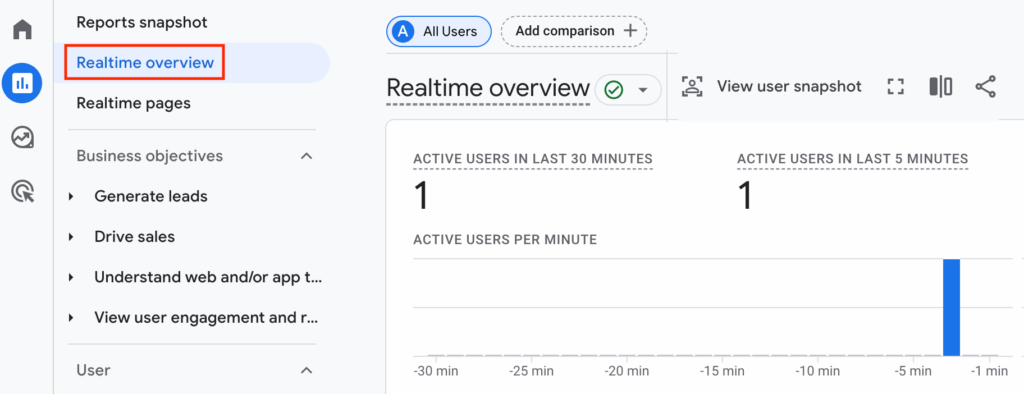
Step 3: Validate the exclusion
Before fully relying on your filter, it’s wise to confirm that internal traffic is actually being excluded:
1. Visit your website from a device using the internal network
2 Open ‘Realtime reports‘ in GA4 and check if your visit appears
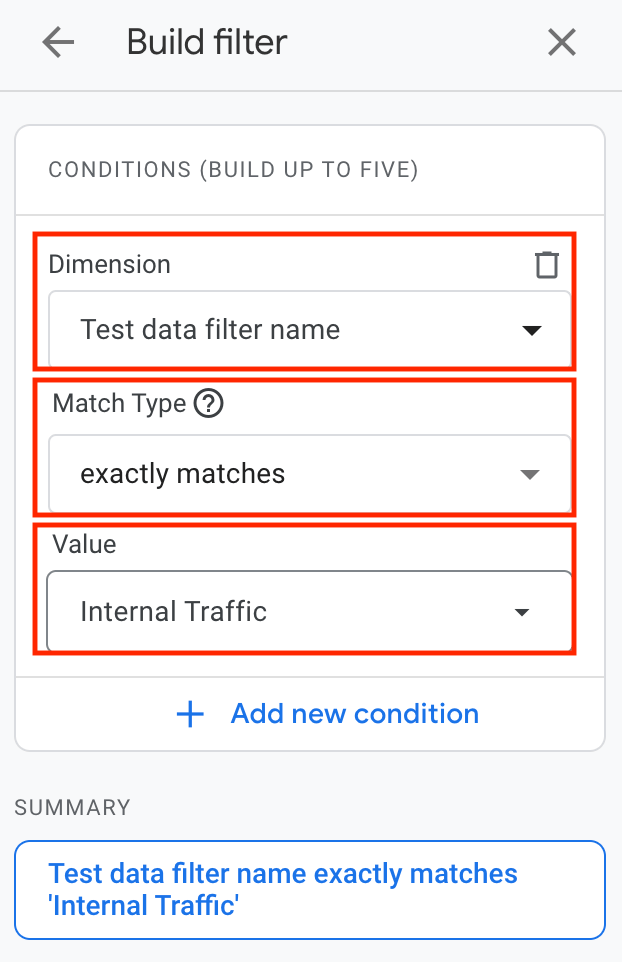
3. Go to any report (for example ‘Traffic acquisition’), and create a temporary filter like so:
- Click ‘Add filter‘
- Set the ‘Dimension‘ to “Test data filter name“
- Set the ‘Match Type‘ to “Exactly matches“
- Set ‘Value‘ to “Internal Traffic“
Conclusion
Excluding internal traffic in GA4 results in cleaner and more accurate data.
By following the steps outlined above, you can ensure that only genuine user interactions are recorded, leading to better decision-making and improved reporting.